Using the |
 |
|
Print Driver |
The print driver is a truly powerful way to bring signing and document management capabilities to any document you have electronic access to through any windows application.
In addition, you can have other people sign documents when desired by simply printing a document, of any type, to their CursiVision print driver ! And this does not require a license to CursiVision on the computer sending the print job. The computer hosting the print driver (on which signing occurs) does need to have CursiVision purchased and installed.
How the print driver works
When a document is printed, CursiVision inspects the location and content of text in the document, looking for a "match" based on printing profiles that you have defined during a previous printing of that document. These "profiles" are defined by your selection of one or more locations in the document, and the content that is within those locations. For example, if you print an Estimate out of your accounting software, the word "Estimate" is likely to appear in the exact same place on every estimate you print in the future. Therefore, when defining the print profile for estimates, you would use the CursiVision configuration tool to indicate that estimates are to be recognized by the word Estimate in a specific location. All of this is very easy to accomplish using a few mouse clicks.
When the document is finished printing - CursiVision will launch, automatically go to the first signing location, and wait for the signature. Upon recieving it, it goes to the next location, if any, and repeats. When all signatures are gathered, the document is passed through the chain of document management tools configured in that printing profile, saves the signed document (which may also have happened in the document tool chain) and then exits. During all of that - not a single mouse click or keyboard action was required of the user at the computer.
Print driver example
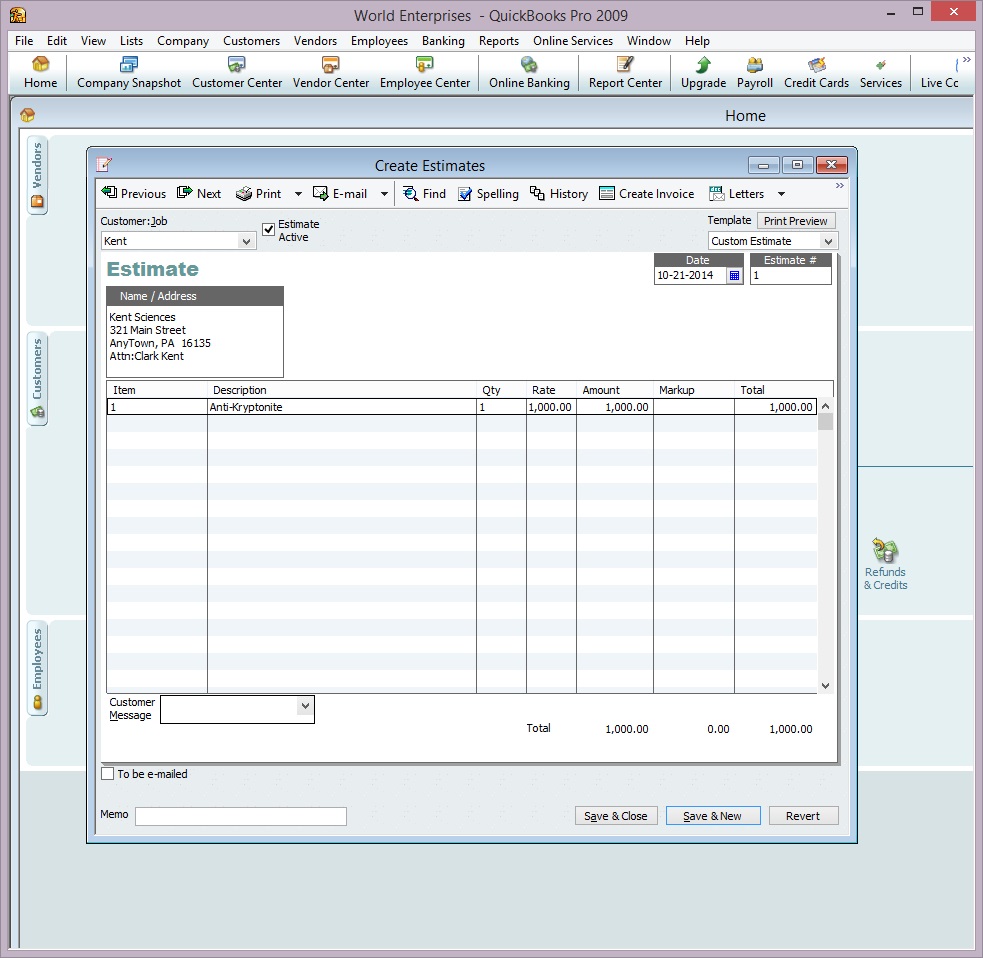
First, we print the document shown in Figure 1 with Intuit QuickBooks.
|
Figure 1. A source QuickBooks Document |
When the document is printed to CursiVision for the first time (simply print from any application, and choose the CursiVision printer), the system will not (yet) recognize this document structure, and will show this dialog:

|
Figure 2. The incoming printed document is not yet recognized by CursiVision |
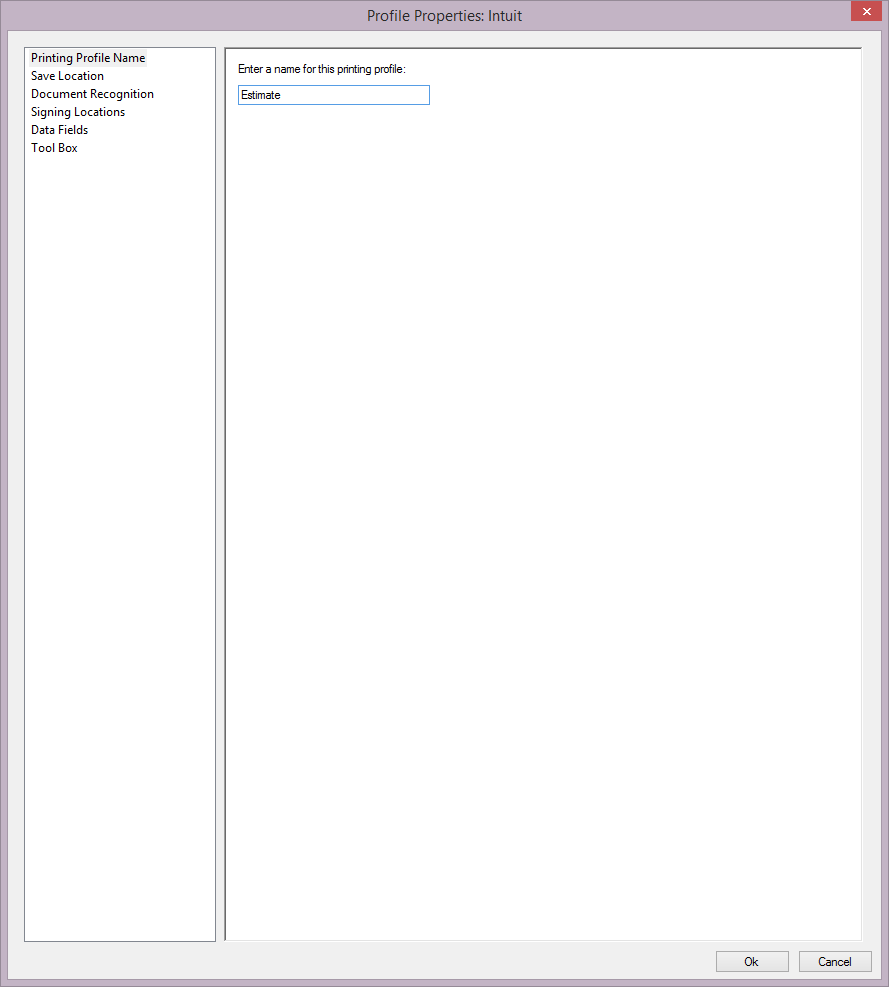
Setting the profile name
When you see this, CursiVision has created a new print profile for the document and is asking you for the name it should use for the profile. Note that this document was printed out of QuickBooks, therefore, you can see it has the default name of "Intuit". The default name is derived from information the printing application sends to the print driver. In some cases, the default name is sufficient. However, some applications, such as QuickBooks, use the same name for everything they print so we do need to change this name to something representing our specific document content, such as Estimate. Profiles can have the same name - however, that causes confusion when you want to work with a profile and need to select it from the list of profiles.
Entering Estimate in the hilited field above, we have Figure 3.
|
Figure 3. The new print profile has been given a new name |
Note: you do not always have to create a profile, if this is a document you are not likely to print again and
do not need to have CursiVision remember your signing and document steps - simply cancel through these dialogs, and click  to
sign and save this document just like any simple document.
to
sign and save this document just like any simple document.
Once you are satisfied with the name, click on the "Document Recognition" text at the left side of Figure 3.
Note: if your application does provide a unique name for this document type, Microsoft Word does, for example, it may be easier to recognize the document by name. To do this be sure and leave the name as shown in Figure 2 at it's default value, then skip the "Document Recognition" steps described here - when you are finished with other settings in the profile and click Ok as in Figures 2 and 3. Then you can instruct CursiVision to recognize the profile "by name". You want to ensure, however, that the printing application will not in the future pass a different name to the CursiVision print driver for this document, otherwise, the profile will not be recognized.
Document Recognition
Document Recognition by name
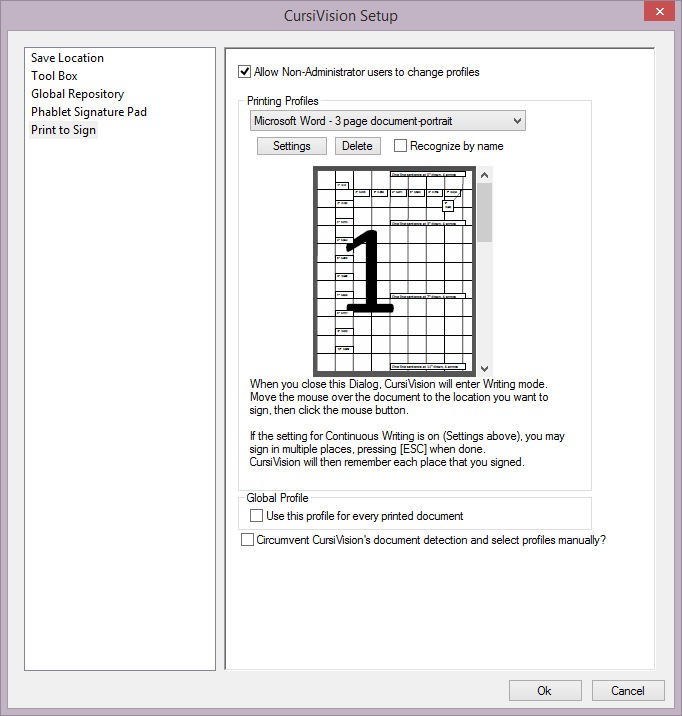
To specify document recognition by name, refer to Figure 4. We arrived at these settings by clicking Global Settings ( )
in the CursiVision toolbar, and then "Print to Sign" in the left side. When the appropriate profile is shown in the drop down list, click "Recognize by Name" below the list. Note the
name that Microsoft Word gave the document as it was printed was used for the profile name, the name was not changed from this default value.
)
in the CursiVision toolbar, and then "Print to Sign" in the left side. When the appropriate profile is shown in the drop down list, click "Recognize by Name" below the list. Note the
name that Microsoft Word gave the document as it was printed was used for the profile name, the name was not changed from this default value.
|
Figure 4. Recognizing profiles by the name supplied by the printing application |
Using CursiVision's advanced document recognition feature
The goal here is to provide enough information for CursiVision to recognize this document in the future.
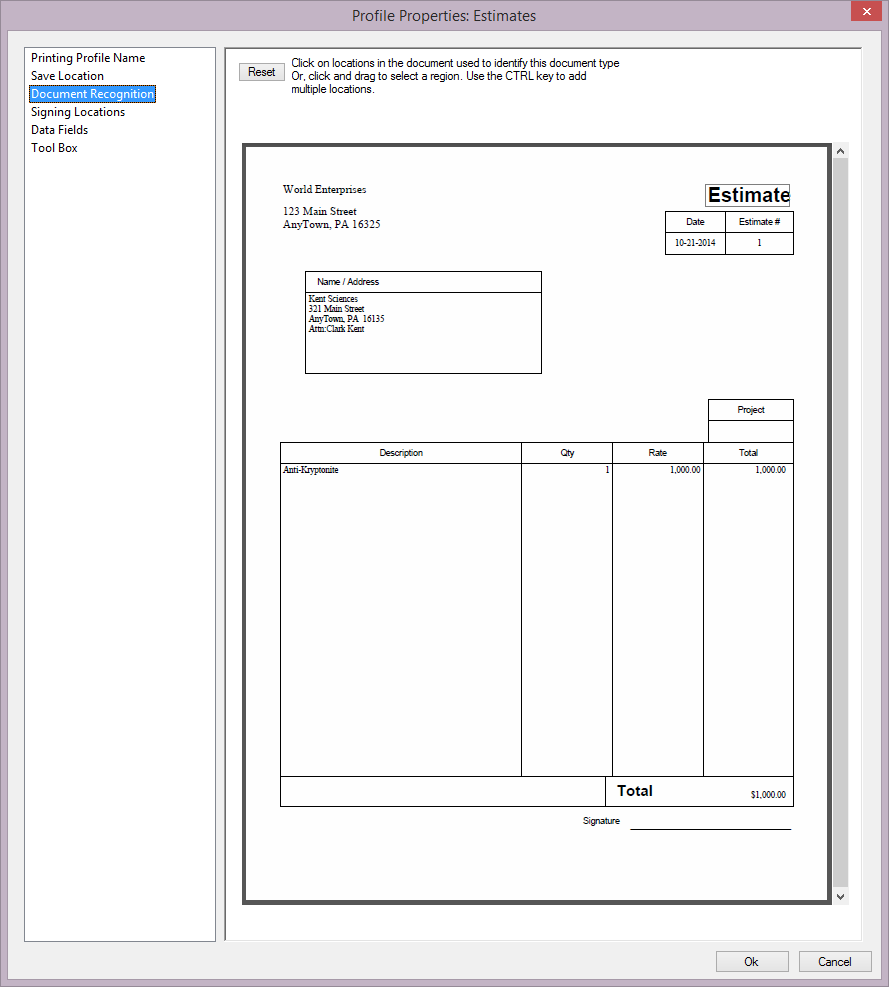
Click on "Document Recognition" on the left side of Figure 2. CursiVision will display the document in the window. All you have to do is point to any text on this document (on any of the first 3 pages) and click it. As you move the mouse over the text, candidate locations will hilite in a solid gray outline (the word Estimate in the above figure). Selected text will be surrounded by a solid green line. To change the selection, simply select different text, or, click Reset in the above left and start over. You can use [Ctrl]-Click to select multiple such locations if needed.
|
Figure 5. Advanced document recognition specification |
In Figure 5, we are about to click on the word "Estimate" in our sample document, this will clearly separate this document type from other documents from any application.
The text you choose should be exactly the same, and in the same place, for every instance of this document. We are automating what will happen throughout the signing and document management process for this document, and since those processes can be entirely different for other types of documents, we want to uniquely identify the document so that it automatically flows through the process without intervention from the user upon future printing.
That's all ! You have given CursiVision enough information to select the correct printing profile to use any time this document gets printed again.
Other settings in the print profile
There are several other settings for the print profile. Briefly, these other categories are:
- Save Location
Where should the document be saved after it is signed ? - Document Recognition
If not using "Recognize by name", what text will be at the same location on this document and all copies in the future? See Document recognition for further treatment of this option. - Signing Locations
Do you want this printing profile to also record the locations on this document where handwriting is performed ?
Note that you can also pre-specify the locations now - rather than after exiting the new profile definition settings. Choose "Signing Locations" from the left side of any of the above figures, and place the mouse over the document and right-click to add a signing location. After adding each location, you can click and drag it to adjust the location, if desired. - Data Fields
Define locations on the document where text can be read from the document into data fields that some CursiVision tools use for processing. Naming the resulting document with values from the document, for example. For more information, visit Data Fields - Tool Box
Specify any of the tool box items you would like to process after the document is signed and before it is saved.
General points on the CursiVision printing sub-system
Administrative permissions
Sometimes, an enterprise might want to setup print profiles for staff and would like to have them stay consistent across all computers in the business. If this is the case, the option "Allow non-Administrator users to change profiles" (which can be seen in Figure 4 above) should be checked off. Note that this option is only available when CursiVision is run "As Administrator" by right-clicking the CursiVision icon and choosing "Run as Administrator".
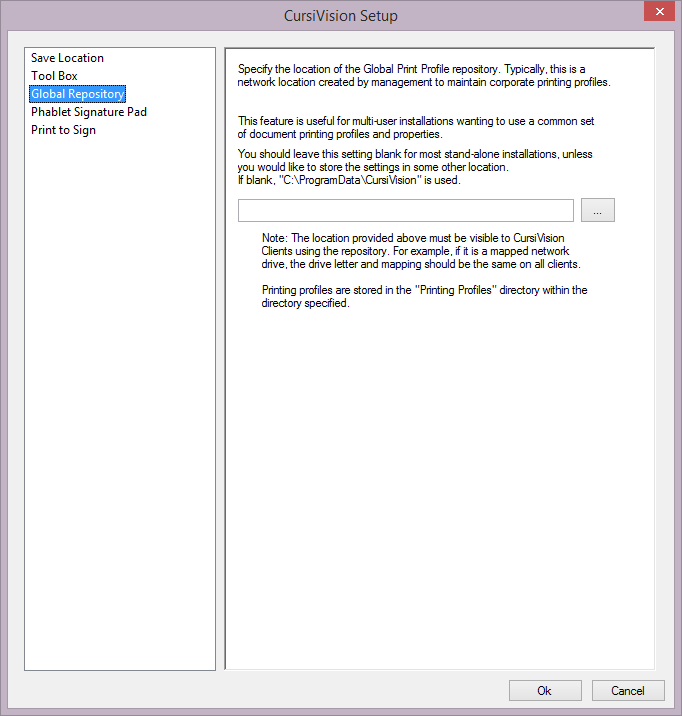
The Print Profile Repository
Again, when run as Administrator (and as an installation option), a facility is provided that makes enterprise wide print profile consistency as easy as possible. This is the specification of a networked location that is used to store the print profiles so that they become visible to everyone in the company as soon as they are defined by any administrative staff (with write access to the specified location).
This location is called the "Global Repository" and is available to Administrators as shown on the left side of Figure 4. Figure 6 shows this and more information about the repository.
|
Figure 6. The Global Print Profile Repository settings |
Editing profiles in the future
Note: Either the user must be logged on as administrator, or the "Allow Non-Administrator..." setting described just above must be selected to allow changes to be made to print profiles. This includes changes to any of the tools used in the profile(s)".
You can view and edit any profile by choosing Global Settings () from the main toolbar,
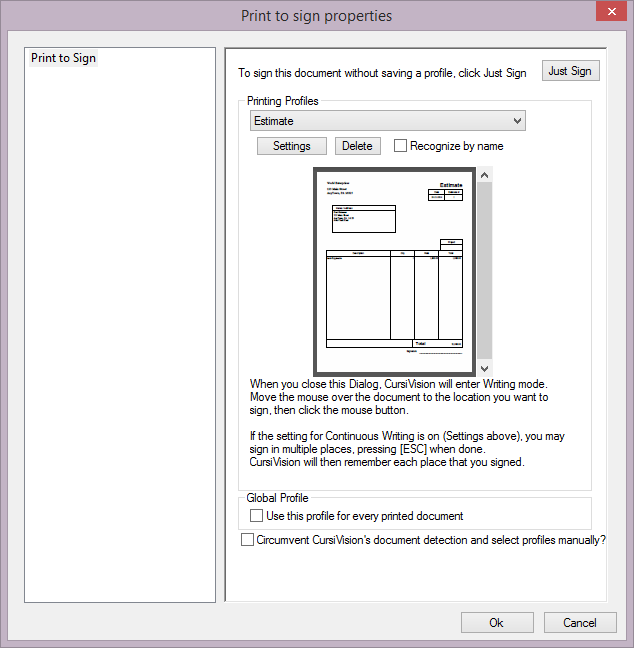
then visit "Print to Sign", select your profile from the list of profiles, and press Settings. The print profile selection facility and other options are shown in Figure 7.
|
Figure 7. The CursiVision print driver subsystem |
Some of the options in the above are:
- Just Sign
This tells the system to skip creating the profile and allow you to start writing on the document and save it per the global configuration options (see Document Settings)
Perhaps you printed an unrecognized document and got the dialog in Figure 2, then canceled that - but want to go right to signing, this option accomplishes that, the system goes from Figure 7 directly to waiting for you to define the signing areas. Otherwise, you would have to re-initiate signing activity by clicking.
Note: This option is only visible when you are creating a new profile. In other words, after you dispatch the dialogs CursiVision presents when it encounters an unrecognized document. If you use Global Settings from the toolbar and then "Print to Sign", you will see a slightly different dialog as shown in Figure 4.
- Settings
Peruse and edit the options for the selected print profile, the same pages that are automatically shown when you first create a profile
- Delete
Delete the profile
- Recognize by Name
Use this option when the profile name generated by the printing application is sufficient to distinguish this document from other documents from that application.
Note also that if you only print 1 type of document from a particular application, using this method of document recognition is the simpler of the two.
- Use this profile for every printed document.
Every future document will use the option selections you made here, or will make in the future. If all of your documents will be treated pretty much the same way, even if they are for different business purposes, this option will mean you never have to define print profiles to CursiVision for documents it does not recognize.
- Circumvent CursiVision's document detection and select profiles manually
If your documents have no unique name coming from the print processor, or, if there is no text that is unique to a document type, that is, to distinguish your document types, use this option to manually select which profile to use for every document.
Writing on the document
After creating your profile, which only happens the first time you print your document, CursiVision enters signing mode and waits for you to write on the document, in as many locations as you'd like.
In our example, the document is configured to "Remember Signing Locations" - this is specified in the properties in the "Signing Locations" in the print profile properties. Therefore, while writing on the document with a new profile, you are "training" this profile to remember the location(s) you visit. On the other hand - you could also specify the locations directly in the "Signing Locations" settings page, in which case, signature capture begins write away after dispatching the print profile settings dialog.
Summary
That is all that is required - you have created a print profile, now when you print the document again from your application, all of the signing locations and the disposition of your resulting document will be played back faithfully.
Did you know that one of the options in the "Save Location" category, is to "Exit" CursiVision after the document has been saved? You can use this feature to cause CursiVision to "disappear" between documents. All of this together means that signing a document with a print profile (after the first time) does not involve even a single mouse click - it starts automatically - and it exits automatically, only writing on the signature pad device is required.