Using the |
 |
|
Document Recognition features |
CursiVision stores the settings you specify for a document so that you can create multiple automated procedures for your documents.
There are many options within CursiVision's writing and document management tools which you may want to specify differently for different documents.
An invoice, for example, may be signed in a particular location, and the resulting document stored in your signed invoices repository. While a rental agreement may need a photo of the item before it leave's the facility added directly to the document.
Document recognition is the key to CursiVision's ability to choose and apply the correct process as a document is presented for writing.
There are two types of document recognition.
- When CursiVision opens a pure PDF file - that is, a file not presented to it via the CursiVision print driver, the system
recognizes the document using the document name in combination with the source directory on the file system.
Thus, different documents from different locations contain unique settings and recognition is automatic.
- When you print a document to the CursiVision print driver (from any application), you tell CursiVision how to recognize the document
using the Document Recognition properties page in the Print Profile Settings.
If you are using the first type of document, writing on pre-existing PDF files from a drive or network location that remains constant, no further information is necessary, you can skip the remainder of this section.
To specify the recognition for a printed document:
If the document is not yet recognized when you print it, CursiVision will automatically open the "Print Profile" settings.
|
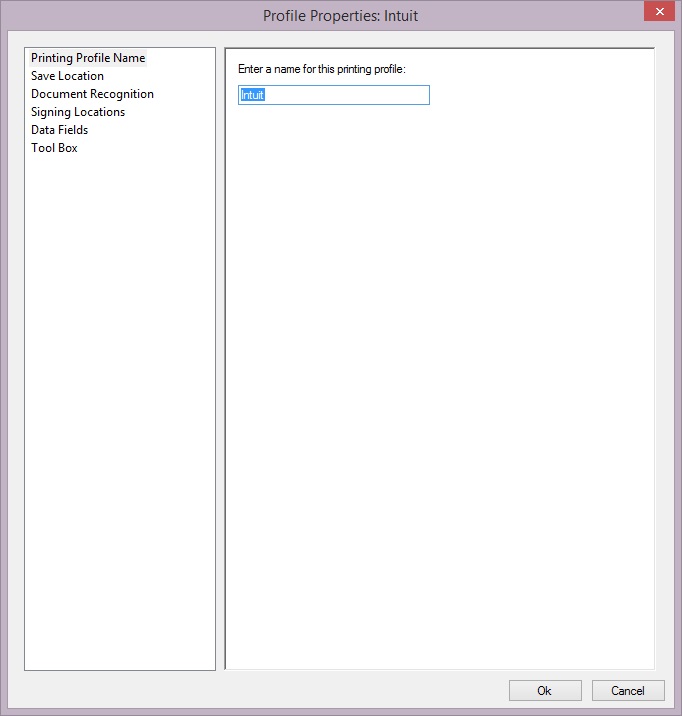
| Figure 1. The default Print Profile name is provided by the printing application. In this particular case, it is not unique to a document type, therefore, it will be necessary to select text from the document to identify the document. |
The first item in these settings is the profile name (see above), CursiVsion will have a default profile name ready for use. Note that different windows applications provide different default names for printed documents, and that these are not always unique to the source document. For example, MS Word will provide a name containing the source document name. Where other applications, such as Intuit Quickbooks might provide a name that is the same for every document printed.
If the application does provide a unique name for it's printed documents, you can select the option to "Recognize by Name" in the print profile settings, and no further action is required to enable CursiVision to remember the settings for this printed document.
Otherwise, one more step is required.
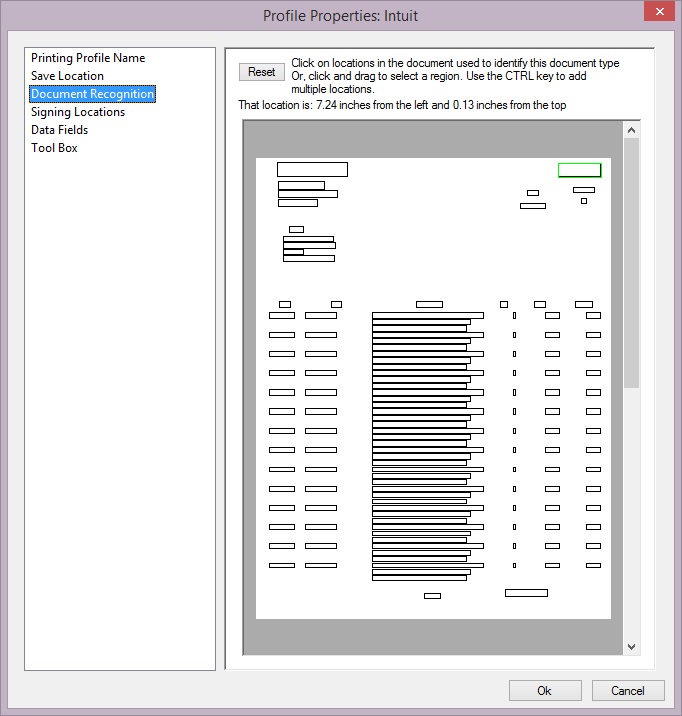
On the Document Recognition page of the settings, an image of the document is shown. The text and graphics are not shown here, only small rectangles representing the location of text in the document.
|
| Figure 2. Choosing text on the document that is consistent for every copy of this class of document. Here - Invoice is selected and it's rectangle is shown in green. |
You click and select one or more of these small rectangles (they will turn green) that will contain the same text for every instance of this document. You can also click and drag out a region on the image for any grouping of text.
A concrete example would be an invoice - it will have the word Invoice in exactly the same place on every invoice printed from the application. You would select the field that contains the word invoice - not the Invoice # - that would be different, but the "label" field for the invoice #.
If you do this, CursiVision will apply the settings you provide for this document type automatically, including the signing (writing) location(s), and where the document is saved.